skip to main |
skip to sidebar
Restrict User Data Entry
- In an unprotected worksheet, choose Review => Changes => Allow Users to Edit Ranges. The Allow Users to Edit Ranges dialog box appears.
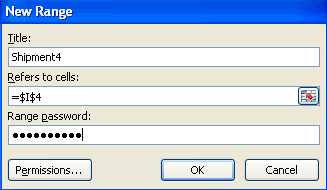
- Click New. The New Range dialog box appears.
- In the Title text box, type a short descriptive name, such as Qty Shipped or Price, for the data entry area.
- In the Refers To Cells box, enter the range you want to allow users to edit. Begin the range with an equal (=) sign. Enter a password that the user must type to gain access to the cell range. Passwords are optional, but without one, any user can enter data into the range.
- Click ok. The Confirm Password dialog box appears.
- Retype the password and then click OK. The Allow Users to Edit Ranges dialog box appears with the newly created range. Choose one of the following:
- Click Protect Sheet to launch the Protect Sheet dialog box.
- Click Apply and add another cell range.
- Click ok to accept the changes and close the dialog box, but not protect the worksheet. Excel doesn't enable the feature until you protect the worksheet.
Enter Data in a Restricted Area
- On a protected worksheet, in any cell with restricted access, begin typing data. The Unlock Range dialog box appears.
- Type the password. Passwords are case-sensitive. Click OK. Excel allows access to the specific range.
- Continue entering cell data as desired.


No comments:
Post a Comment